Check Tires and Wheels
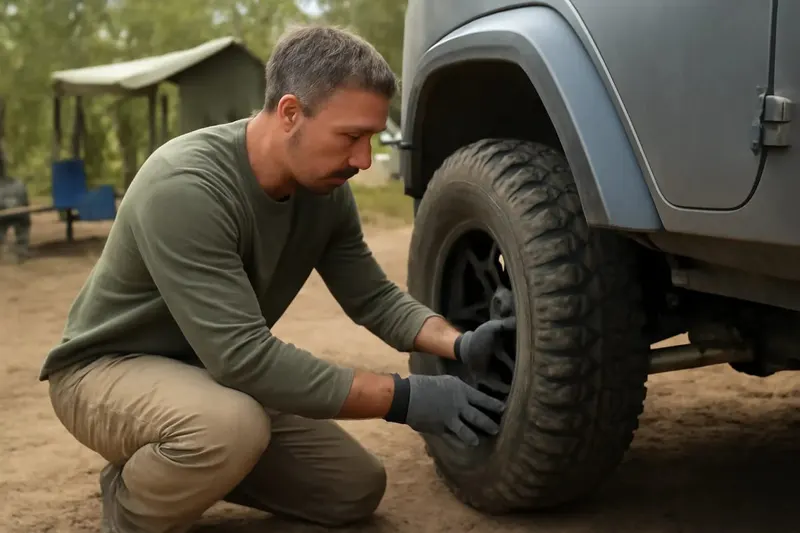
Tires deserve close attention because they carry the load through everything the trail throws at them. Inspect each sidewall for cuts, bulges, embedded rocks, and punctures, then look at the tread for uneven wear or anything stuck deep enough to matter. If you aired down, reset pressures before assuming a tire is fine, because a slow leak can hide behind a lower trail pressure. It also helps to compare all four corners so one soft tire does not go unnoticed, especially if the trail included rocks, ruts, or sharp brush.
Move on to wheels, valve stems, and lug hardware. Look for bent rims, missing balance weights, damaged valve caps, and mud or gravel packed around the bead area. If a wheel took a hard hit, watch for vibration on the drive home and recheck the torque once the vehicle has cooled and settled. Good tire and wheel checks are among the most important post-trail inspection steps because they directly affect control, braking, and the ability to get home without a roadside problem. They also tell you whether a tire can stay in service or should be monitored more closely before the next trip.
Do not forget to inspect the spare if it has been carrying the same dirt and vibration as the rest of the vehicle. A spare with low pressure, a damaged valve stem, or an old crack is no help when you actually need it. If you use beadlock-style hardware or similar off-road wheel components, look for signs that anything loosened or shifted during the run. The goal is not only to spot damage, but to confirm that every wheel can still do its job the next time the trail gets rough.
Inspect Underbody and Suspension
The underside of the vehicle often tells the full story of the trail. Shine a light along the skid plates, crossmembers, control arms, steering components, and driveline to look for impacts, bends, scrapes, or fresh metal exposure. Small gouges are normal on an off-road rig, but deep dents, cracked brackets, and hanging shields deserve attention. Catching these early can prevent rubbing, fluid loss, or a part loosening on the next trip, and it can also show you where your clearance limits really are.
Next, check suspension pieces for shifted hardware, torn boots, leaking shocks, or anything sitting at an odd angle. Look at springs, sway bar links, bushings, and steering joints for signs that they were loaded harder than usual. If you hear clunks or feel wandering after the trail, do not ignore them; they are worth a closer look before the vehicle goes back into daily use. This step is especially valuable for beginners because many underbody problems are easy to miss until they create a second issue. A slow, methodical inspection here helps you catch wear before it turns into a more expensive repair later.
If the trail included mud, water, or repeated bump impacts, pay extra attention to areas where moving parts meet fixed ones. A torn boot or displaced clip can let contamination in, even if the component still seems to work normally on the drive home. Look for witness marks where one part has been touching another, since those shiny contact points often reveal a shift in alignment or clearance. A careful underbody check gives you a better picture of what the terrain actually changed, not just what you felt from the driver seat.
Look for Fluid Leaks and Damage
After off-road use, a fresh leak can show up where you least expect it. Check under the engine, transmission, transfer case, differentials, and around hoses and fittings for drips, wet grime, or spray patterns on nearby parts. A quick wipe with a clean rag can help you tell old residue from a new leak. If you spot anything suspicious, note the location before washing the vehicle so you can track whether it returns. That habit makes it easier to separate trail dust from a real problem.
Also inspect the cooling system and fuel-related areas without rushing. Look for a loose clamp, a shifted hose, or debris packed against a radiator or intercooler that could affect airflow. Even if everything looks dry, keep an eye on gauges during the next drive to confirm normal behavior. These post-trail inspection steps are not about overreacting; they are about confirming that the vehicle survived the trail without hidden damage that might show up later. If something smells hot, looks stained, or feels unusually wet, treat it as a sign to check again before the rig goes back into regular use.
It is also smart to look for less obvious signs of trouble, such as dust sticking to an area that is normally clean or a small wet ring under a parked vehicle. Those clues can point to a seep that is too light to leave a dramatic puddle. Take a few photos with your phone if you are unsure, especially if you want to compare the area after your next drive. Simple documentation can make it easier to tell whether a condition is stable, getting worse, or already resolved.
Browse our recommended gear
Our featured picks refresh periodically. While we update them, our editorial guides can help you find the right gear for your rig.
See our guidesClean Mud, Debris, and Recover Gear
Cleaning is part of inspection, not just part of maintenance. Mud can hide cracks, trap moisture, and make it hard to see whether hardware moved, so remove buildup from the frame, suspension, bumpers, fender wells, and skid plates. Pay attention to the area behind wheels and around moving parts, where debris can collect and stay damp. A careful rinse or brush-out also makes the rest of your inspection easier because problem areas are no longer masked by dirt. It can also reveal fasteners, drain paths, and contact points you could not see on the trail.
Do the same with recovery gear and trail tools once the vehicle is squared away. Unpack straps, shackles, traction boards, gloves, and any air-down equipment so you can check for cuts, bent edges, mud contamination, or missing pieces. Let wet items dry fully before storing them, and re-pack everything in a way that makes the next trip simple. Keeping gear clean and organized is one of the most practical post-trail inspection steps because it protects the equipment you may need on the next run. It also helps you notice which items were actually used, so you can replace or service only what needs attention.
As you clean, think about what was exposed to the hardest conditions. Recovery items that were dragged through grit or mud may need a closer look at stitching, pins, or attachment points, even if they still appear usable. The same idea applies to tools, compressors, and pressure gauges that may have been bounced around in the cargo area. A clean, sorted kit is easier to trust, and it makes your next trail prep faster because you are not guessing what is missing or damaged.
Reset Baselines for the Next Trip
Once the vehicle is clean and checked, take a moment to reset the basics. Confirm tire pressures are back where you want them, lug nuts are seated properly, and any accessories removed for the trail are reinstalled or secured. If you disconnected lights, battery-related accessories, or onboard air equipment, make sure everything is connected in the right order and functioning as expected. A short post-trail reset helps the rig transition smoothly from trail use back to regular driving. It also reduces the chance of leaving something loose or forgotten until the next time you need it.
This is also the right time to note what the vehicle felt like on the trail. Write down anything that squeaked, shifted, scraped, or required adjustment so you have a record for later. That note can help you decide whether to inspect a component again before the next outing or keep an eye on it over time. Organized follow-through turns a one-time check into a repeatable routine, which is what makes post-trail inspection steps genuinely useful for long-term readiness. A few careful notes now can make your next pre-trip check faster and more focused.
Think of this reset as a bridge between the trail and the rest of the week. If you use a checklist, update it with anything you discovered so the next inspection starts from real experience instead of memory alone. Even small details, like a trim panel that rattled or a cargo mount that shifted, can be useful the next time you pack. The more consistent your reset, the easier it becomes to spot patterns before they turn into avoidable wear.