Why Early Leak Detection Matters
Spotting a fluid leak early is one of the simplest ways to protect a vehicle before a small issue becomes a trail-stopping problem. A few drops under the engine bay or around a wheel can point to a slow seep that is easy to miss on a busy day. Left alone, that seep can become a low-fluid condition, a messy underbody, or a repair that interrupts a planned trip.
For off-road drivers, early detection matters even more because vibration, dust, heat, and uneven terrain can make small leaks spread faster or show up in places you would not expect. A quick look before and after a drive helps you notice changes instead of guessing when something started. The goal is not to panic over every stain, but to build a habit that catches warning signs while they are still manageable.
Most fluids leave clues that are easy to compare once you know what to look for. Fresh drips, damp seams, and shiny residue often stand out more than a full puddle. If a spot appears in the same area more than once, treat it as a pattern worth checking rather than a one-time mess.
That habit is especially useful when the vehicle carries extra gear, has seen rough roads, or is packed for a weekend away from town. A simple visual check takes only a minute, yet it can protect belts, hoses, brakes, cooling parts, and drive systems from avoidable strain. Early spotting is less about mechanical expertise and more about paying attention before a minor issue spreads.
What Fluid Clues Look Like
Different fluids leave different clues, and learning those signs makes spotting a fluid leak early much easier. Engine oil often looks brown to amber and may feel slick on a dipstick, pan, or driveway. Coolant can leave green, orange, pink, or yellow stains depending on the formula, and it often dries to a crusty edge near a fitting or hose.
Transmission fluid usually appears red or reddish-brown, while power steering fluid can look similar but may be darker on an older vehicle. Brake fluid is often clear to amber and may leave a thin, wet-looking patch near a wheel or master cylinder area. Washer fluid is easier to confuse with water, so smell and location can help you tell it apart from a true leak.
Color is only one clue, and it is not always reliable if the fluid is old, dirty, or mixed with road grime. Texture and placement matter just as much. A greasy film around a gasket or a drip hanging from a low point can be more important than the exact shade of the stain.
Pay attention to where the mark starts and where it ends. A leak often begins higher up and travels along a bracket, seam, or hose before dropping to the ground. If you can follow the path back to a wet source, you are much closer to understanding whether the issue is minor seepage or something that needs a closer look.
Where to Check First
Start with the spots most likely to show a problem: under the engine, around the oil pan, near hoses, and around the transmission area. Then look at wheel wells, brake backing areas, and the ground below the vehicle after it has been parked for a while. Those areas often reveal the first sign of a slow leak because fluid gathers where gravity and movement send it.
Underbody protection and skid plates can hide the source, so do not rely on the visible drip alone. If you see fresh fluid but cannot find the origin, check above the lowest point for damp dust, streaks, or a wet connection. On off-road vehicles, grime can disguise a leak until dust sticks to the fluid and forms a darker patch.
Open the hood and use a light to inspect hoses, clamps, reservoirs, and seams around common service points. Look for swelling, cracking, loose caps, or a wet edge that does not match the rest of the compartment. If the vehicle has been run recently, be cautious around hot parts and let surfaces cool before getting close.
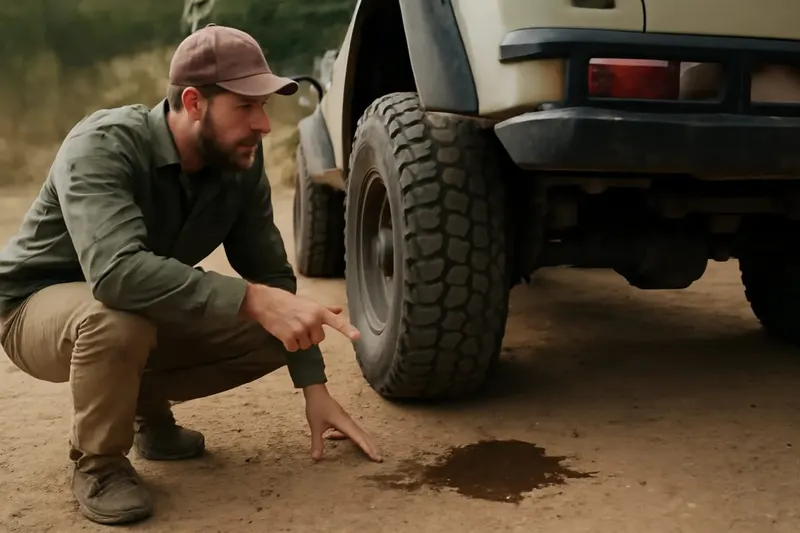
After parking, glance at the pavement or cardboard under the vehicle, then compare the location with the vehicle layout. A spot toward the front center may suggest engine or cooling system seepage, while a stain near the rear can point to fuel, differential, or transfer case areas depending on the vehicle. You do not need to identify every component immediately; you only need to notice that a pattern exists.
Simple Checks You Can Do
A clean paper towel, rag, or cardboard sheet can help you separate an old stain from a fresh leak. Wipe a small area, then check it again after a short drive or after the vehicle sits overnight. If the same spot becomes damp again, that is a clearer sign than a random mark on a dirty surface.
Use the dipsticks, sight windows, and reservoir marks that the vehicle already provides. A level that drops over time can confirm that a leak is real even when the ground stays dry. Checking levels before a trip and again after a demanding day on the trail gives you a simple comparison without needing special tools.
Listen for small changes as well. A hiss, drip, or new smell after shutdown can point to fluid escaping onto hot parts or collecting where you cannot see it easily. If the vehicle pulls to one side, shifts differently, or starts running warmer than usual, consider whether a leak may be part of the story.
Keep your inspection steady and repeatable. Use the same parking spot, lighting, and routine when you can, because that makes changes easier to notice. The more consistent your check, the easier it becomes to spotting a fluid leak early before a problem blends into the background noise of normal use.
Browse our recommended gear
Our featured picks refresh periodically. While we update them, our editorial guides can help you find the right gear for your rig.
See our guidesHow to Avoid Misreading Signs
Not every wet spot is a leak, and not every leak leaves a big puddle. Rainwater, air conditioner condensation, spilled washer fluid, or mud tracked into the undercarriage can all look suspicious at first glance. A careful, calm check keeps you from chasing harmless marks while still taking real warning signs seriously.
Try to match the stain with recent conditions. If the vehicle was driven through water, washed, or parked on soft ground, the evidence may be misleading until the area dries. Clean the suspected location and observe it again so you can tell whether the fluid returns from the same seam or hose.
Also remember that some leaks only appear when the system is under pressure, warmed up, or moving. That means a vehicle may look fine in the driveway and still show signs after a highway run or a rough trail section. A second inspection after use is often more revealing than a quick glance before departure.
Do not overlook smell, but do not depend on it alone. Fuel, coolant, oil, and gear lubricant each have distinct odors, yet dirt and heat can blur those differences. The safest approach is to combine sight, touch, smell, and fluid level checks so you can sort out a true leak from a harmless mark.
Building a Routine Before Trail Days
A short inspection routine works best when it fits into the normal rhythm of prepping for a drive. Walk around the vehicle, glance under it, check levels, and look for fresh dampness near common trouble spots. Doing that before loading up gear gives you time to address a small concern instead of discovering it halfway down the trail.
It also helps to repeat the same steps after the outing, especially if the vehicle saw bumps, heat, or long stretches of rough terrain. New fluid on the skid plate, a fresh streak near a hose, or a drop on the ground can tell you something changed during the trip. That post-drive check is often where spotting a fluid leak early pays off most clearly.
Keep a few basics with your trail kit, such as gloves, a rag, and a bright light, so inspections are easier and cleaner. A simple notebook entry or phone note with the date, location, and fluid level can make patterns easier to track over time. Even if you are not diagnosing the issue on the spot, you are building a useful record for later attention.
The best routine is the one you actually use. It does not need to be complicated, and it does not need to slow down the day. A practical habit of checking, comparing, and noting changes can prevent avoidable downtime and help keep the vehicle ready for the next route.
When a Leak Deserves Attention
Any leak that grows, changes color, or leaves repeated fresh spots deserves prompt attention. A tiny seep may be manageable for a short time, but a fluid level that keeps dropping or a stain that keeps spreading should not be ignored. The earlier you notice the change, the easier it is to avoid secondary damage and disrupted plans.
Pay special attention if the leak is near brakes, cooling components, fuel lines, or major drivetrain parts. Those systems affect how safely and reliably the vehicle can be driven, so a small sign in the wrong place can matter more than a larger mark elsewhere. If you are unsure what you are seeing, slow down, document the area, and avoid assuming it is harmless.
It is also wise to stop and inspect if the vehicle suddenly smells different, runs hotter, shifts oddly, or leaves a new puddle after a short drive. Those changes can mean the leak is active, not just residual residue. In that case, continuing without a closer look can turn a simple warning into a bigger setback.
Good trail readiness is mostly about awareness, not perfection. By checking often, noting changes, and trusting small clues, you make spotting a fluid leak early part of your normal prep. That steady approach keeps the vehicle easier to trust when the route gets longer, rougher, or farther from home.