What a Recovery Point Is and Why It Matters
Recovery point basics start with a simple idea: if a vehicle gets stuck, you need a purpose-built place to attach recovery gear. A recovery point is not just any sturdy-looking part of the vehicle. It is a designated attachment point designed to handle controlled pulling loads during extraction or towing situations on the trail.
For beginners, the key distinction is between something that seems strong and something that is actually intended for recovery. Common factory tie-down loops, tow hooks, or aftermarket recovery points may look similar, but they are not always interchangeable. The safest approach is to treat recovery as a planned part of vehicle preparation, not as an improvisation after the vehicle is already bogged down.
On off-road terrain, vehicles can sink into mud, lose traction on sand, slide on rock, or become high-centered. In those moments, a well-chosen recovery point gives you a controlled place to connect a strap, shackle, or other compatible recovery equipment. That controlled connection helps reduce the chance of slipping, bending, or damaging body panels and suspension components.
For a beginner, the lesson is straightforward: if you drive off pavement, recovery points are part of trail readiness, not an accessory to think about only after trouble starts.
Understanding Front and Rear Recovery Points
Most off-road vehicles benefit from recovery points at both the front and rear. That matters because recovery does not always happen in the direction you first expect. A vehicle may need to be pulled forward out of a rut, backed out of a soft shoulder, or repositioned in a tight trail section where a forward pull is not the safest option.
Front recovery points are often used more frequently because many stuck situations are resolved by moving the vehicle forward or out of an obstacle. Rear recovery points matter just as much, especially when a vehicle needs to reverse away from an edge, back out of mud, or be repositioned without forcing the drivetrain to pull in an awkward direction.
When evaluating recovery point basics, look for symmetry, strength, and access. A point should be easy to identify, easy to reach, and positioned so recovery gear can connect without scraping sharp edges or contacting fragile components. The goal is not merely having a point on the vehicle; it is having one that is practical when conditions are messy and visibility is poor.
It is also important to understand that recovery points are not universally interchangeable across all vehicles. Some platforms come with factory recovery hooks or mounts, while others rely on aftermarket solutions. In either case, the point should be purpose-built for recovery and installed according to the manufacturer’s instructions.
Factory Points vs. Aftermarket Options
Beginners often ask whether factory recovery points are enough or whether aftermarket hardware is necessary. The honest answer is that it depends on the vehicle, how it is used, and what the factory equipment is designed to handle. Some factory points are useful and well integrated. Others are better suited to light assistance or transport-related tasks, not repeated off-road extraction.
Aftermarket recovery points are typically chosen when a vehicle needs more robust, more visible, or more conveniently placed attachment options. A well-designed aftermarket setup can make recovery easier to organize and can provide a more intentional interface for straps, soft shackles, or bow shackles where appropriate.
Still, more metal does not automatically mean more safety. The important question is whether the part is designed for recovery loads, installed correctly, and compatible with the rest of the vehicle setup. A strong-looking bracket attached poorly can be a bigger concern than a modest-looking factory point that is properly engineered.
For shoppers comparing options, focus on the design details rather than marketing language. Look for clear instructions, correct mounting orientation, and a recovery-specific purpose. Avoid using hardware that is meant only for transport tie-downs unless the vehicle documentation clearly identifies it as a recovery point.
How to Evaluate a Recovery Point
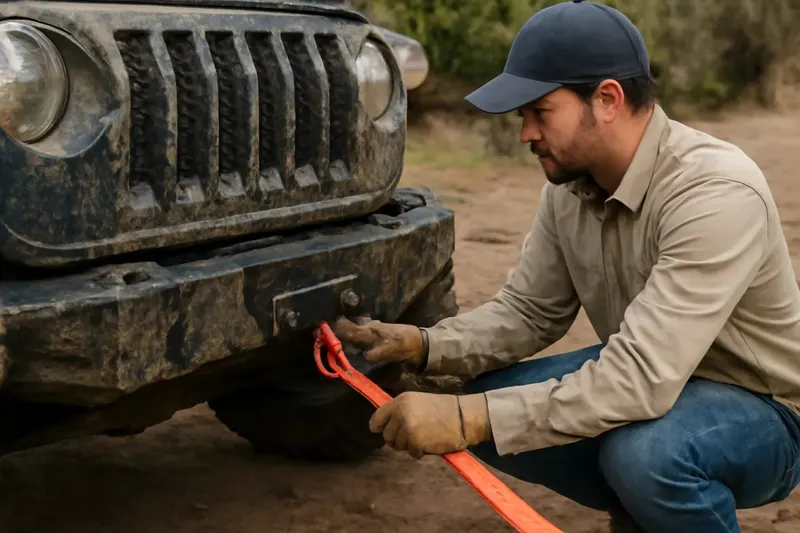
One of the most useful recovery point basics for beginners is learning how to inspect a point before it is needed. A recovery point should be solidly mounted, free of obvious damage, and positioned so the pull direction is sensible. If the point is bent, cracked, loose, or heavily rusted, it should not be trusted for recovery use until it has been properly addressed.
Check for clean mounting surfaces and hardware that appears appropriate for the application. If a point is bolted on, make sure the mounting bolts are correct for the design and that nothing appears to be shifting. If the point is welded or integrated into the bumper, inspect for deformation, collision damage, or corrosion around the attachment area.
It is also wise to look at nearby components. Recovery hardware should not be forced to pass over sharp edges, fragile plastic, exposed wiring, or suspension parts. A proper recovery point gives the line a clear path and reduces the chance of scraping or pinching during the pull.
Finally, think about visibility. In mud, snow, or low light, a recovery point that is easy to locate is more practical. A beginner benefits from bright, accessible, and uncluttered attachment points because trail conditions rarely allow time for guesswork.
Browse our recommended gear
Our featured picks refresh periodically. While we update them, our editorial guides can help you find the right gear for your rig.
See our guidesMatching Recovery Gear to the Point
Recovery point basics also include compatibility. A recovery point is only one part of the system. It must work with the strap, shackle, or other recovery gear you plan to use. Using the wrong connection method can create unnecessary risk or damage the vehicle and gear.
Many beginners start with a simple recovery strap, a soft shackle, or a bow shackle used according to the manufacturer’s guidance. The important part is that the attachment interface matches the shape and purpose of the point. Some recovery points are designed with a round hole for a shackle-style connection, while others use a hook-friendly shape or a closed-loop design.
Avoid forcing gear into a point that is too small, too sharp-edged, or awkwardly shaped for the connection you are making. If the line angle looks poor or the fit seems compromised, stop and reassess. A clean, controlled setup is always better than a rushed connection.
Also remember that recovery gear should be treated as a system, not a pile of individual parts. The point, the strap, the connector, and the anchor vehicle all need to make sense together. When any one piece is mismatched, the whole setup becomes less predictable.
Common Beginner Mistakes to Avoid
Several mistakes show up again and again when people first learn recovery point basics. One of the most common is using the wrong part of the vehicle because it looks strong. Bumpers, suspension arms, tow ball mounts, and random brackets may appear sturdy, but that does not make them appropriate recovery points.
Another common mistake is attaching to a point without checking the pull direction. Recovery should be organized so the connection is as straight and controlled as practical. Side-loading or awkward angles can place extra stress on the point and the vehicle structure.
Some beginners also overlook damage. A recovery point that has already been stressed, bent, or impacted may not behave as expected under load. If something looks questionable, the safer choice is to pause and inspect it before proceeding.
It is also unwise to treat recovery gear as a shortcut for poor trail judgment. Recovery points are for controlled extraction when a vehicle is legitimately stuck or needs assistance. They are not a license to push deeper into terrain than the vehicle, driver, or conditions justify.
Finally, avoid confusing convenience with readiness. Having a visible point is useful, but readiness comes from understanding how the point works, how it interfaces with gear, and when to stop and reassess.
Basic Pre-Trail Checks
Before a trail run, a quick recovery point check can save time and frustration later. Start by looking at each point for looseness, cracks, deformation, rust, or missing hardware. If your setup uses bolts, confirm that the fasteners appear secure and that nothing has shifted since the last outing.
Next, confirm that front and rear points are easy to access with your usual recovery gear. If aftermarket accessories, skid plates, or accessories are blocking access, it is better to discover that in the driveway than in mud or soft sand.
It is also helpful to verify that your recovery gear is packed where you can reach it without unpacking the whole vehicle. Recovery point basics are not just about the point itself. They are about the complete chain from stuck vehicle to safe recovery process.
For beginners, a simple habit works well: inspect, confirm access, and make sure the gear you plan to use matches the points on the vehicle. That routine does not require advanced knowledge, but it can prevent a lot of confusion when the trail gets difficult.
Building a Simple Recovery Mindset
The most useful part of learning recovery point basics is developing a calm, practical mindset. Good recovery starts before the vehicle is stuck. It begins with knowing where your points are, what they are for, and how your gear connects to them.
For beginners, that means reading the vehicle and gear instructions, looking at the mounting hardware, and thinking through how a recovery would happen in real conditions. It also means recognizing when conditions are getting worse and when it may be smarter to stop, reassess, or choose a different line rather than digging deeper.
Recovery points are a small part of an off-road setup, but they play an important role in trail readiness. When they are chosen carefully, inspected regularly, and used with compatible gear, they make recovery more organized and less stressful.
In the end, the goal is not to recover like an expert on day one. The goal is to understand the basics well enough to prepare the vehicle responsibly and to use the equipment with confidence when the need arises.