Overview
A pre-trip off-road vehicle inspection covers five general areas: tires and wheels, fluids and leaks, lights and electrical, brakes and underbody, and cargo and load security. This is a general framework, not a substitute for your owner's manual or a qualified mechanic's inspection -- if you notice anything unusual during a check, or you're unsure how to evaluate a component, have a professional take a look before heading out.
A quick pre-trip check takes fifteen to twenty minutes for most vehicles and catches a meaningful share of the issues that could otherwise turn into a problem far from help. See our maintenance and safety hub for related post-trail inspection guidance.
Treat this as a routine rather than a one-time task reserved for big trips. A short version of the same check before a routine local outing builds a habit that makes the more thorough version second nature before a longer or more remote trip.
Tires and wheels
Check tread depth and look for uneven wear, which can indicate an alignment or suspension issue worth addressing before a trip. Inspect sidewalls for cuts, bulges, or embedded debris, and confirm pressure matches your intended use -- on-road pressure for the drive to the trailhead, adjusted as needed once you're airing down for terrain.
Confirm your spare tire is also properly inflated and that you have a working jack and the tools needed to change a tire, since a flat is one of the more common trailside issues. See our tires and wheels hub for more on tire selection and pressure concepts.
Check lug nut torque periodically as well, particularly after any recent wheel work, since vibration from trail driving can gradually loosen fasteners that were adequately tightened for on-road use.
Fluids and leaks
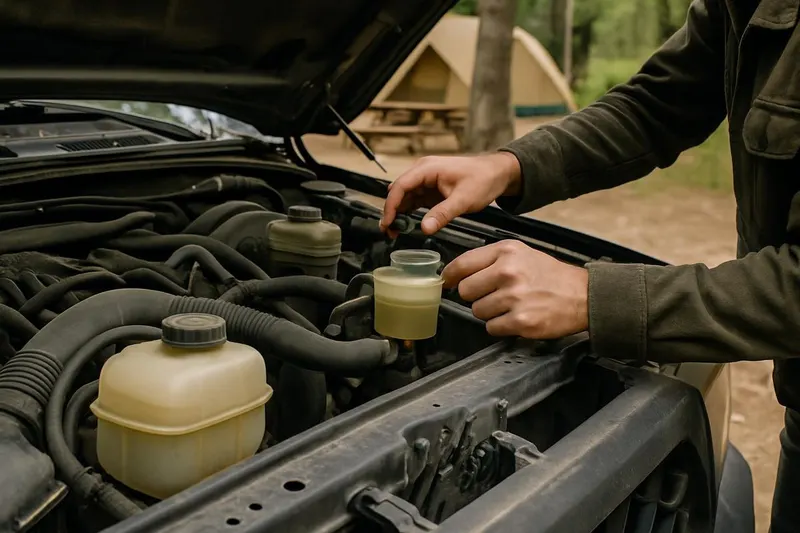
Check engine oil, coolant, brake fluid, and transmission fluid levels against your owner's manual's specifications, and look underneath the vehicle for any signs of fresh leaks before you leave. A small leak caught early at home is a minor fix; the same leak discovered on the trail can end a trip or, in some cases, cause more serious damage.
If any fluid looks low, discolored, or you notice a leak you can't identify, address it before departing rather than hoping it holds for the trip. When in doubt, a qualified mechanic can evaluate an issue far more reliably than guesswork in a parking lot.
Keep a small log of fluid levels and any top-offs between full services, since a fluid that consistently needs topping off between changes can be an early signal of a developing leak worth investigating before it becomes a bigger issue.
Lights and electrical
Test headlights, taillights, brake lights, and turn signals, ideally with a second person to confirm each one from outside the vehicle. Check your battery terminals for corrosion and confirm connections are secure, since electrical issues are more likely to surface under the vibration and stress of trail driving.
If you've installed auxiliary lighting or other electrical accessories, confirm they're functioning and that any relevant fuses are intact. See our lighting and electrical hub for more on auxiliary lighting and wiring safety.
Browse our recommended gear
Our featured picks refresh periodically. While we update them, our editorial guides can help you find the right gear for your rig.
See our guidesBrakes and underbody
Listen and feel for any unusual noise, pulsing, or pulling when braking during your drive to the trailhead, and address anything unusual before continuing onto more demanding terrain. A visual check of brake components generally requires the vehicle to be lifted, so this is often better handled by a qualified mechanic during routine maintenance rather than a quick pre-trip glance.
Check for loose or missing underbody hardware, and confirm any skid plates or protective components are securely mounted, since loose hardware can work its way free during sustained off-road vibration.
Cargo and load security
Secure all cargo so nothing can shift or become a hazard during rough terrain, sudden stops, or an unexpected tip in angle. Loose heavy items are both a safety risk to occupants and a potential source of vehicle damage if they shift unexpectedly.
Confirm your total load -- passengers, gear, and any installed upgrades -- stays within your vehicle's rated payload capacity. Overloading affects handling, braking distance, and component wear, and it's an easy detail to overlook when gear accumulates gradually over multiple trips. See our off-road gear hub for general cargo organization ideas.
Building a simple tool kit
A basic on-board tool kit supports both your pre-trip check and any small adjustments needed on the trail: a tire-pressure gauge, a jack and lug wrench sized for your vehicle, basic hand tools, jumper cables or a portable jump starter, and duct tape or a similar all-purpose repair item. This isn't a substitute for a mechanic's toolbox, just enough to handle minor, common issues.
Keep your tool kit in a consistent, known location in the vehicle, and periodically confirm nothing has gone missing or been borrowed for another purpose and not returned. A tool kit that's incomplete when you actually need it defeats the purpose of carrying one at all.
Browse our recommended gear
Our featured picks refresh periodically. While we update them, our editorial guides can help you find the right gear for your rig.
See our guidesCreating a repeatable routine
A checklist is most useful when it's actually repeated consistently rather than performed thoroughly once and then skipped on later trips. Writing your specific checklist down -- on paper, in a notes app, or printed and kept in the glovebox -- makes it easier to follow the same steps every time rather than relying on memory, especially early in the morning before a trip when it's easy to rush.
Consider pairing your pre-trip check with a similar post-trip routine, since issues caused by a trail day often show up more clearly right after driving than they would sitting in a driveway days later. A consistent before-and-after habit catches more developing problems than either check alone.
When to postpone a trip
Not every issue found during a pre-trip check needs to end your trip entirely, but some genuinely should. A active fluid leak, a warning light you can't explain, unusual braking behavior, or a tire with visible sidewall damage are all reasonable grounds to postpone until a qualified mechanic has looked at the vehicle, even if it means a disappointing last-minute change of plans.
It helps to decide your own thresholds in advance, before you're standing in a driveway eager to leave. Treating "when in doubt, don't go" as a default policy, rather than a decision made in the moment under time pressure, tends to lead to better judgment.
Group trips and shared responsibility
On group trips, it's worth confirming that every vehicle has completed some version of a pre-trip check, rather than assuming everyone else has handled it. A single unprepared vehicle can affect the whole group's trip if it develops a problem partway through, especially on remote routes with limited turnaround options.
Designating one person to informally confirm everyone's readiness before departure -- tires, fluids, and a basic sense of each vehicle's condition -- adds a small amount of accountability without being intrusive. This is especially useful for group trips that include newer off-roaders who may not yet have a consistent inspection habit of their own.
Final thoughts
A consistent pre-trip inspection habit -- tires, fluids, lights, brakes, underbody, and cargo -- catches many of the issues that would otherwise surface at an inconvenient time on the trail. This checklist is a general framework, not professional guidance specific to your vehicle; when something looks or feels unusual, involve a qualified mechanic rather than guessing or hoping it resolves on its own.
See our maintenance and safety hub for post-trail inspection guidance to pair with this pre-trip framework, and our tires and wheels hub for more on tire-specific checks.