Start With a Clear Kit Layout
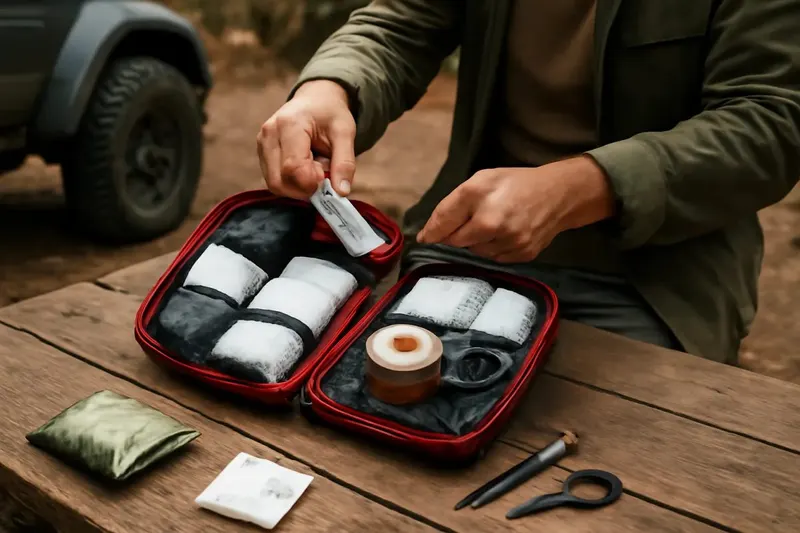
Portable first-aid kit organization starts with a layout you can understand quickly when your hands are dusty and your attention is split. Keep the contents grouped by purpose instead of tossing everything into one pouch and hoping it stays tidy. A simple structure such as bleeding care, cleaning, wraps, tools, and personal items makes it easier to find what you need in a hurry. The goal is not a medical showpiece; it is a kit that opens the same way every time.
Choose a pouch or case with a wide opening, enough internal pockets, and a shape that fits where you actually store gear in the vehicle. If the bag is too deep or too floppy, small items disappear at the bottom and slow you down. Clear sleeves, mesh pockets, and labeled pouches help keep the layout consistent, but even a basic bag works when the system stays simple. A good trail kit should be easy to grab, easy to open, and easy to repack after use.
Think about the order of access as much as the items themselves. Put the most commonly reached items near the top or in the outer pockets, while backup supplies can live deeper in the kit. If multiple people ride together, make the layout intuitive enough that someone else can find the basics without a long explanation. That kind of portable first-aid kit organization reduces fumbling and helps the kit do its job when time matters.
It also helps to keep the kit visually calm. Avoid overstuffing the pouch, mixing unrelated gear, or cramming loose items into every corner. A tidy kit is easier to inspect, easier to restock, and less likely to hide missing pieces. When the layout stays consistent, packing for the next trip becomes a quick check instead of a full rebuild.
Use Pouches and Labels
Small sub-pouches are one of the simplest ways to improve portable first-aid kit organization. Instead of scattering supplies across the main compartment, group related items into smaller bags or zip cases. One pouch can hold cleaning and wound-care basics, another can hold wraps and tape, and a third can hold tools or backup supplies. This keeps the main kit from turning into a loose pile every time you open it on the trail.
Labels make those groups more useful, especially if the kit may be shared by family or passengers. A short tag or patch on each pouch can save time and reduce confusion when someone else reaches for the kit. Clear labels are better than complicated codes because they work in low light and do not depend on memory. If you want a cleaner look, use color coding in addition to labels so each category is easy to spot at a glance.
The trick is to stay consistent, not decorative. Put the same type of item in the same pouch every time so restocking becomes routine. If a pouch gets full, split the category before it becomes crowded and hard to close. That keeps the kit flexible without losing structure, which is especially useful when you are balancing trail tools, recovery gear, and cabin storage.
Labels also make inventory checks much faster before a drive. Open each pouch, confirm the basics, and note anything that needs replacement after the trip. You do not need a complicated checklist system to benefit from order. Even a few clearly named pouches can make a portable first-aid kit feel more reliable and much easier to use in a real hurry.
Pack for Speed and Access
A trail kit should be packed for the way it will be used, not just for how it looks on a shelf. Put the items you would reach for first near the opening of the bag or in an outer pocket. That usually means gloves, basic cleaning supplies, simple wraps, and other small essentials should be easy to see and remove without emptying the whole kit. The less digging you do, the less likely you are to miss something important while you are trying to stay organized.
Heavier or less frequently used items can sit lower in the case, where they will not crush delicate supplies. Keep sharp tools covered or separated so they do not puncture soft items or get snagged in the bag. If your kit has removable dividers, set them so the sections stay open even when the pouch is partly full. A clear pocket map inside the bag can be more helpful than a long written list because it supports quick memory in a noisy, dusty setting.
Think about access with gloves on and limited space around you. Zippers with large pulls, hook-and-loop compartments, and simple closures are easier to manage than tiny snaps or nested bags. If the kit is stored in the vehicle, place it where you can reach it without unloading half the cargo area. Portable first-aid kit organization works best when the packing order matches real trail conditions, not ideal garage conditions.
After each trip, repack the kit the same way so the layout stays familiar. This habit matters more than adding extra gear. A fast, repeatable arrangement saves time and reduces stress, which is exactly what a trail-ready kit should do. If someone else ever needs to use it, they will have a much better chance of finding what they need quickly.
Browse our recommended gear
Our featured picks refresh periodically. While we update them, our editorial guides can help you find the right gear for your rig.
See our guidesProtect Supplies From Damage
Off-road travel can be hard on gear, so the kit itself should protect its contents from heat, dust, and crushing. Choose a case that closes securely and holds its shape well enough that items do not spill out when it moves around. Soft pouches can work, but they should still have enough structure to keep bandage packs, gauze, and small tools from getting flattened. If the bag lives in a vehicle, avoid placing it where loose cargo can press on it constantly.
Moisture control matters too, especially if the kit rides through changing weather or wet trail conditions. Keep supplies in sealed inner bags when possible so one damp item does not affect everything else. Do not overpack the case to the point that closures strain or seams stretch. A little empty space is useful because it keeps the contents easier to sort and helps avoid shifting when the vehicle shakes over rough ground.
Temperature swings can also affect how clean and orderly a kit stays. If the bag sits in direct sun, items may soften, warp, or become harder to separate later. Store the kit in a shaded part of the vehicle whenever possible, and inspect the case occasionally for wear. Torn pockets, broken zippers, and cracked containers create clutter fast and make even a well-planned system harder to trust.
Good protection is part of organization because damaged gear is hard to organize well. If the kit uses small rigid boxes or inner sleeves, check that they do not leave sharp edges or awkward gaps. The best setup is one that keeps supplies intact while still allowing quick access. That balance makes a portable first-aid kit easier to maintain across many trail days, not just the first one.
Build a Simple Inventory Habit
Organization only lasts if you check the kit after use. Make it a habit to open the pouch at home, confirm what came out, and put everything back in its assigned place before the next ride. This is the easiest time to notice empty slots, torn packaging, or items that need to be replaced. A few minutes of attention now is better than discovering a missing piece when the kit is already needed.
It helps to keep a short inventory card or note inside the case. The list does not need to be elaborate; it just needs to remind you what belongs in each pouch and what should be restocked. You can use it as a quick reference before leaving the driveway and again after the trip. If more than one person may touch the kit, the card also helps everyone return items to the same location.
Try to restock at the same time you unload other trail gear. That way the first-aid kit becomes part of the normal cleanup routine instead of an extra chore. When a pouch runs low, refill it before the shortage spreads across the whole case. Small, regular checks are much easier than waiting until the kit is messy enough to require a full reset.
Inventory habits also reveal whether your current layout actually works. If you keep moving the same item around to find it faster, that is a sign the organization needs to change. A simple system should support your habits, not fight them. The most useful portable first-aid kit organization is the one you can repeat without thinking too hard after a long trail day.
Tailor the Kit to the Trip
Not every trail day calls for the same kit loadout. A short local drive may need a compact pouch with the basics, while a longer remote trip may justify a more complete setup with extra backups. The important part is keeping the structure consistent even when the contents change. If you swap items in and out by trip type, use the same labeled sections so you are never starting from scratch.
Think about the people who will actually use the kit and the environment you expect to encounter. Group personal items where they are easy to identify, and keep general supplies separate so the bag stays orderly when multiple hands open it. A kit for solo travel can stay very small, but a family or group kit benefits from clearer labels and a little more breathing room. The more varied the use case, the more valuable simple organization becomes.
Seasonal changes can also shape the layout. If your trail season brings heat, rain, or dust, review which cases and pouches are still holding up. Repack anything that has become cluttered or hard to close, and remove items that no longer belong in the core kit. Consistent organization keeps the bag adaptable without turning it into a random catchall.
That flexibility is what makes a portable first-aid kit practical for off-road use. You are not building a shelf display; you are building a tool that stays useful in motion. When the contents match the trip and the sections stay clear, the kit feels lighter to manage and faster to use. That is the kind of readiness most trail drivers actually need.