How Much Water to Pack
Water storage for off-roading starts with a realistic estimate of use, not a guess based on a single bottle. A short day trip can still call for drinking water, a little cleanup water, and a reserve for delays, detours, or slower trail speeds than planned. The number rises quickly with heat, dust, extra passengers, pets, and any stop where you may be away from pavement longer than expected.
A practical approach is to plan for the trip length first, then add margin for time that may stretch. Pack enough that no one has to ration too early, but do not count on convenient store stops once you leave the main road. If your route includes camping, coffee, basic cooking, or washing hands after trail work, those needs should be accounted for before you settle on a container size.
It also helps to think in layers instead of one all-purpose supply. A small drink-ready container is useful for quick access, while a larger reserve can stay sealed until needed. That makes it easier to keep the main supply untouched unless the trip runs long or conditions change.
For families or groups, the safest plan is usually to over-prepare within reason rather than assume everyone will drink less on the trail. People often use more water than expected when the cabin gets hot or the day turns rougher than planned. When in doubt, build in a buffer and store it in a way that does not crowd critical gear or block access to essentials.
Container Types and Materials
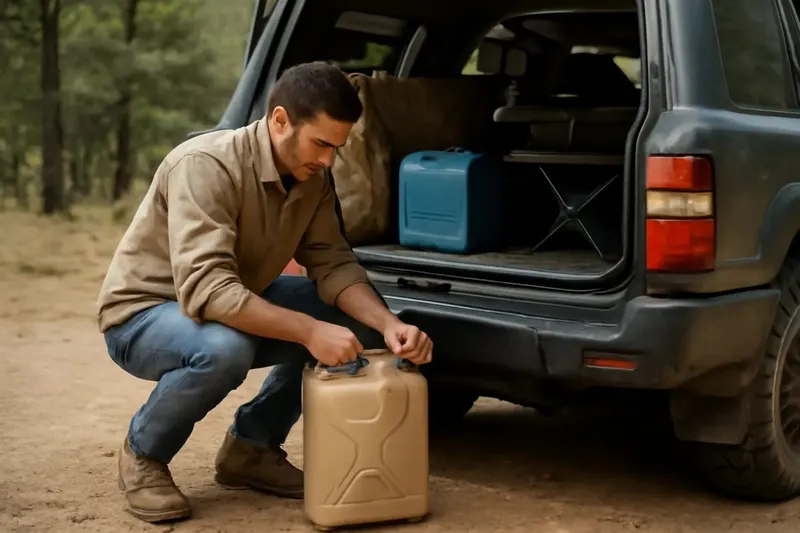
Common water containers for trail use include rigid jugs, collapsible bladders, and larger tanks made for vehicle storage. Rigid containers are easy to lift, stack, and keep upright, while soft bladders save space when empty and can fit into odd cargo gaps. Each style has tradeoffs in stability, convenience, and how well it matches the way you pack a vehicle for rough travel.
Material choice matters because off-road travel adds vibration, sun exposure, dust, and repeated handling. Food-safe plastics are common, and opaque containers can help limit light exposure inside the water supply. Look for a design that seals securely, is simple to clean, and feels sturdy enough to ride in a cargo area without constant babysitting.
Durability is only part of the decision. The container should also be easy to fill without splashing, easy to pour from when parked on uneven ground, and easy to inspect for cracks or worn seals. A cap that is awkward to open while wearing gloves can become irritating fast once the day is dusty and long.
Shape matters too because cargo areas are rarely perfect rectangles once recovery tools, bags, and camp items are loaded. A tall narrow jug may fit one vehicle better than a squat container, while a low-profile tank may be easier to secure under a shelf or against a seatback. The right choice is the one that fits your actual packing pattern, not just the one with the largest claimed capacity.
Keeping Water Clean
Clean storage is a major part of water storage for off-roading because trail water often sits longer than water used at home. Wash containers before the trip, let them dry fully, and keep lids, caps, and spouts covered during transport. If a container will hold anything other than drinking water, make sure it is dedicated to that single use so odors, residue, and grime do not carry over.
On the trail, keep the drinking supply separate from rinse water, tools, recovery gear, and fuel containers. Store spouts, hoses, and fill points where cargo dust cannot easily reach them, and close everything back up as soon as you are done using it. When you refill, use the cleanest source available and avoid leaving open containers uncovered in a dusty campsite or in the back of a vehicle.
It is also smart to handle the container the way you would any other food-contact item. Wash your hands before opening caps if possible, and avoid setting lids on dirty tailgates, rocks, or bare ground. Small habits like that help keep trail dust, grit, and other debris out of the water supply without adding much effort.
If you are storing water for several days, check it before each leg of the trip instead of assuming it stayed clean on its own. A secure seal reduces the risk of contamination, but a quick inspection can catch a loose cap, a damaged spout, or a container that picked up grime during loading. Clean storage is easier to maintain than to fix after the fact.
Browse our recommended gear
Our featured picks refresh periodically. While we update them, our editorial guides can help you find the right gear for your rig.
See our guidesWhere to Store It in the Vehicle
Placement affects both safety and convenience, especially on rough roads where loose cargo can shift. Heavy water should sit low and as close to the vehicle center as practical so it does not become a moving load. Keep it away from sharp edges, moving gear, and places where a leak could soak soft bags, electronics, or other sensitive equipment.
For water storage for off-roading, think about access as well as security. A container buried under everything else is hard to reach when you need it quickly, so balance easy access with solid retention. If a jug will be used often, choose a spot where it can be removed and returned without unloading half the cargo area first.
Temperature is worth considering too, because water stored in direct sun or near hot cargo can become unpleasant to drink. Whenever possible, place the container where it is shaded by the vehicle structure or protected by other gear without trapping moisture against it. Cooler placement does not just improve comfort; it can also make the water more appealing so people actually drink enough.
Think through the order of use before you pack. Items that are needed only at camp can sit deeper in the vehicle, while the day-use supply should be reachable without disturbing the rest of the load. That small bit of planning helps you avoid unloading gear on a muddy shoulder just to reach a bottle or jug.
Mounts, Straps, and Shift Control
Even a small water container can move enough on a trail to make noise, wear through surrounding gear, or become hard to grab. Use straps, brackets, or cargo systems that hold the container snugly without crushing it. The goal is to prevent bounce and side-to-side movement while still leaving the cap and handle easy to reach.
Check the load after the first few miles, then again whenever terrain changes from smoother road to washboard, steep climbs, or uneven surfaces. A secure setup should keep the container stable without relying on loose bags or stacked soft items to brace it in place. If the container shifts when you brake, corner, or climb, the storage plan needs adjustment before the trip gets longer.
Retention matters because repeated movement can loosen caps, scuff the container, or create pressure points in the cargo area. A strap that is snug at the trailhead may settle after the vehicle warms up, so a quick recheck can prevent a small problem from becoming a bigger mess later. In practical terms, the best setup is the one that stays quiet and predictable as the terrain changes.
Try to avoid using water as a filler object to pin down unrelated cargo. That can work in a pinch, but it often leaves the container harder to remove and may put stress on the spout or handle. Dedicated retention is cleaner, safer, and easier to live with when the day involves frequent stops or rough sections.
Practical Trail Use and Resupply
Trail trips go more smoothly when the water plan matches the way you actually travel. Keep a bottle or small jug within reach for the driver and passengers, and leave the larger reserve packed separately. That split makes it easier to ration the main supply while still giving everyone a quick drink without unpacking the whole vehicle or opening the main stash repeatedly.
Resupply planning matters when a route crosses towns, public land entrances, or camp areas where water may be available. Do not assume every stop will have a reliable source, and do not wait until the supply is nearly empty before thinking about topping off. A spare empty container can help if you expect to refill along the way and want more flexibility for the return leg or an unexpected overnight stay.
It helps to treat water like part of the trip schedule, not an afterthought. Build a quick check into your departure routine so the containers are full, sealed, and where you can actually reach them. If you travel with others, let everyone know which supply is for drinking and which is reserved for camp or cleanup.
For longer trail days, consider how often the vehicle will be stopped and whether you will be moving through dust-heavy sections where people tend to drink more once you pause. A well-placed container that is easy to access can encourage regular sipping, which is more effective than waiting until everyone is already very thirsty. Good planning keeps the trip comfortable and reduces avoidable stress when the route takes longer than expected.