Overview
Traction boards and recovery straps solve different problems and are not interchangeable. Traction boards give a stuck tire something to grip against in soft, low-traction ground -- sand, mud, or snow -- so a vehicle can drive itself out under its own power. Recovery straps, by contrast, connect two vehicles so one can pull the other, which requires a second vehicle, rated recovery points on both, and an understanding of the forces involved.
Confusing the two, or assuming one can substitute for the other, is a common beginner mistake. This guide explains what each tool actually does, where each one falls short, and how to think about which situation calls for which approach.
See our broader recovery gear hub for how to plan a full recovery kit around your vehicle and terrain.
Both tools are common enough that it's worth understanding them even before you own either one, since knowing which situation calls for which approach shapes how you plan a trip and what you choose to carry in the first place.
What traction boards do
Traction boards are rigid panels, typically with a textured or cleated surface, placed in front of or behind a stuck tire to provide grip on soft ground. They're most useful when a vehicle is stuck because a tire is spinning without finding purchase -- sand, mud, loose snow, or a soft trail surface -- rather than because the vehicle is physically wedged against an obstacle.
Using traction boards generally involves clearing loose material away from the tire, positioning the boards against the tread, and driving forward or backward slowly and steadily rather than applying sudden throttle. Sudden acceleration can spin a tire off the board before it gains traction, undoing the setup.
Traction boards work solo, without needing a second vehicle, which is part of their appeal for drivers who often travel alone. That said, they only help with a traction problem -- they won't free a vehicle that's high-centered or mechanically stuck against an obstacle.
What recovery straps do
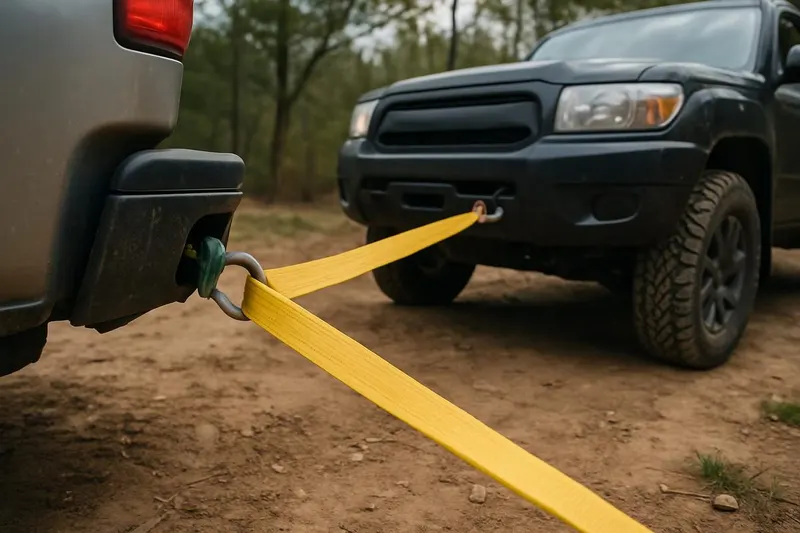
Recovery straps connect a stuck vehicle to a second, capable vehicle so it can be pulled free. This requires both vehicles to have rated recovery points, a shared understanding of the plan between drivers, and enough clearance and traction for the pulling vehicle to safely apply force.
There are different types of straps and ropes, including static tow straps and kinetic recovery ropes, each with different stretch characteristics and appropriate use cases. Regardless of type, a strap only works if both vehicles' recovery points are rated for the forces involved and the equipment is inspected and free of visible damage before use.
Because a recovery strap involves a second vehicle and a load under tension, it introduces risks that traction boards don't: bystanders and both drivers need to stay clear of the load path, communication between vehicles matters, and an unfamiliar technique is a good reason to seek training first rather than improvise.
Some drivers also use a strap in combination with a winch rather than a second vehicle, anchoring to a tree or other fixed point instead. That approach introduces its own considerations, including tree-protection straps to avoid damaging the anchor point, and is generally a more advanced technique worth learning under supervision rather than attempting for the first time alone.
When each tool falls short
Traction boards generally won't help if a vehicle is high-centered -- resting on its underbody rather than its tires having grip -- because the problem isn't traction, it's clearance. In that situation, digging out the underbody or using a different recovery approach may be necessary.
Recovery straps depend entirely on having a second, capable vehicle available, along with rated recovery points on both. If you're traveling solo, or if no other vehicle nearby has adequate rated capacity, a strap isn't an option regardless of how good the equipment is.
Both tools also depend on terrain and judgment. Attempting either technique on a slope, near a drop-off, or in conditions beyond your experience level increases risk regardless of which tool you're using.
Using them together, not interchangeably
Many general-purpose recovery kits include both traction boards and a strap, because they address different scenarios rather than duplicating each other. A well-rounded beginner kit might use traction boards as a first attempt for a traction-only problem, keeping a strap and a second vehicle in reserve for situations that need an actual pull.
Some situations call for both: traction boards to help a vehicle get moving, combined with a strap-assisted pull if the traction boards alone aren't enough. Treat this as a last-resort combination rather than a default approach, and stop to reassess if a recovery attempt isn't working rather than escalating force.
Browse our recommended gear
Our featured picks refresh periodically. While we update them, our editorial guides can help you find the right gear for your rig.
See our guidesChoosing for your situation
If you frequently travel solo or in areas with soft, loose terrain like sand or snow, traction boards are often the more broadly useful first purchase, since they don't depend on a second vehicle. If you regularly travel in a group with other capable vehicles, a properly rated strap and shackles add a complementary option for situations traction boards can't solve.
Whichever you choose, confirm compatibility with your vehicle's rated recovery points, read the manufacturer's instructions in full, and consider practicing with the equipment in a low-stakes setting before you need it in the field.
Maintaining both tools
Traction boards are relatively low-maintenance -- rinse off mud and debris after use, check for cracks or significant wear from repeated flexing under a tire's weight, and store them away from prolonged direct sun where the material can become brittle over time. A damaged board can fail unexpectedly under load, so replace one that shows cracking rather than continuing to rely on it.
Recovery straps and ropes need more careful attention: inspect for fraying, cuts, or UV damage before every use, and retire any strap you're unsure about rather than risk a failure under tension. Store straps away from prolonged moisture and sun exposure, and keep any shackles or hardware free of rust and functioning smoothly. A quick inspection habit before each trip catches most developing issues before they become a problem in the field.
Cost and storage space
Traction boards are generally bulkier to store than a strap and shackles, which fit into a relatively small bag. If cargo space is limited, this is worth factoring into your decision, particularly for smaller vehicles where every cubic foot of storage matters.
Cost varies widely within both categories depending on material and size, so it's not accurate to say one category is inherently more affordable than the other. Compare specific options based on your budget and storage constraints rather than assuming either tool type has a fixed price point.
Final thoughts
Traction boards and recovery straps are complementary tools, not interchangeable ones. Traction boards solve a traction problem and work without a second vehicle; recovery straps solve a pulling problem and require one, along with rated recovery points and careful technique. Understanding the difference -- and the limitations of each -- is more valuable than owning either one without knowing when it actually applies.
If you're building a recovery kit from scratch, it's reasonable to start with whichever tool matches your most common travel style -- traction boards for frequent solo trips, or a properly rated strap and shackles if you usually travel with other capable vehicles -- and add the other over time as your kit and experience grow. See our recovery kit essentials guide for how these tools fit into a broader kit.