Overview
Off-road lighting covers two related but distinct needs: auxiliary lights mounted to the vehicle for driving visibility, and camp lighting for use once you've stopped. This guide focuses on the concepts that matter for both -- beam patterns, placement, legality, glare, and wiring safety -- without recommending specific products or invented brightness claims.
Lighting upgrades can meaningfully improve visibility on dark trails, but poorly aimed or installed lighting can create glare for other drivers, drain your battery unexpectedly, or run afoul of local regulations. See our lighting and electrical hub for more on this category, and our maintenance and safety hub for general electrical-system checks.
As with other vehicle-upgrade decisions, it helps to think about lighting as a category with real trade-offs rather than a straightforward "more is better" upgrade. The right setup depends on how and when you actually drive off-road, not just what looks capable mounted to a bumper or roof rack.
Spot vs flood beam patterns
Spot beams focus light into a narrow, longer-range pattern, useful for seeing farther down a trail at speed. Flood beams spread light more widely over a shorter distance, useful for illuminating the area immediately around and beside the vehicle, such as during slow, technical driving or when navigating tight turns.
Many auxiliary lighting setups combine both -- spot lights for forward visibility and flood lights for wider peripheral coverage -- since each pattern serves a different situation. Consider how you actually drive: fast, open trails benefit more from spot-focused lighting, while slow, technical terrain benefits more from flood coverage.
Some products advertise a combination beam pattern in a single housing, blending spot and flood characteristics. These can be a reasonable middle ground for drivers who don't want to install and wire two separate light types, though a dedicated setup of each generally offers more precise control over where light actually falls.
Placement and glare
Mounting height and aim angle matter as much as the light itself. Lights mounted too high or aimed too level can create glare for oncoming traffic or other trail users, even if the light output itself is reasonable. Aim auxiliary lights slightly downward, and test their aim in a controlled, legal setting -- such as a private area -- before relying on them on an active trail or road.
Auxiliary lights are typically intended for off-road, off-highway use rather than public roads, where their beam pattern and brightness can distract or blind other drivers. Many jurisdictions require auxiliary lights to be covered or switched off on public roads -- check your local and state regulations, since requirements vary.
Consider mounting position relative to your vehicle's existing lights as well. Auxiliary lights mounted too close to headlights can create an overwhelming, undifferentiated glare for oncoming drivers, while lights spread across a bumper or roof rack tend to produce a more usable, distinguishable beam pattern. If you're unsure about placement, a shop experienced with off-road lighting installations can advise on options suited to your specific vehicle.
Legality and responsible use
Lighting regulations vary by state and locality, covering aspects like maximum light output, allowed colors, mounting height, and whether auxiliary lights can be used on public roads at all. Research your specific state's regulations before installing auxiliary lighting, and default to using powerful auxiliary lights only in appropriate off-highway settings.
Responsible use also means being considerate of other trail users. Even where legal, running high-output lights toward oncoming vehicles or nearby campsites can be genuinely disruptive. Dim, redirect, or switch off auxiliary lighting when other people are nearby.
Wiring safety basics
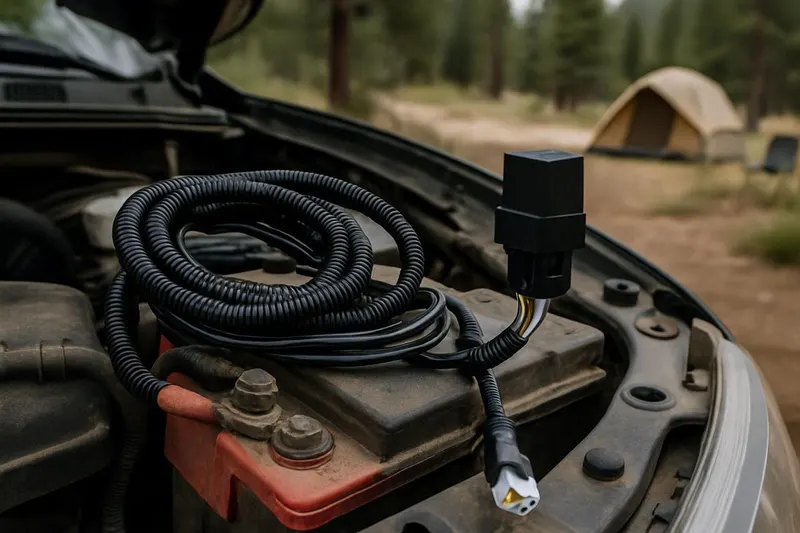
Auxiliary lighting should generally be wired through a relay and an appropriately sized fuse, rather than connected directly to a low-current circuit not designed for the additional load. A relay lets a low-current switch safely control a higher-current lighting circuit, protecting both the wiring and the switch itself.
Route cables away from sharp edges, moving parts, and heat sources, and secure them so they can't rub through their insulation over time. If you're not confident with vehicle electrical work, installation by a qualified professional reduces the risk of a wiring fault, which can range from a blown fuse to a fire hazard in more serious cases.
Unused electronics and lighting left connected can also drain your battery over time, even when switched off, if wired incorrectly. Confirm your installation includes a proper switched circuit rather than a constant power draw.
Browse our recommended gear
Our featured picks refresh periodically. While we update them, our editorial guides can help you find the right gear for your rig.
See our guidesPower draw and battery care
Auxiliary lighting adds to your vehicle's overall electrical load, which matters most when the engine isn't running and lights are drawing power directly from the battery, such as during an extended stop at camp. Running multiple high-output lights off a starting battery for an extended period risks draining it below what's needed to restart the vehicle.
A dual-battery setup, with a separate auxiliary battery isolated from the starting battery, is a common solution for drivers who regularly run accessories while parked. This is a more involved installation than basic auxiliary lighting and is often best handled by a qualified installer, particularly if it involves an isolator or battery management system.
If you don't have a dual-battery setup, get in the habit of running the engine periodically during extended stops with lights or other accessories active, and monitor your battery's condition over time, since repeated deep discharges can shorten a standard automotive battery's working life.
Choosing color temperature and output
Auxiliary lights are commonly available in a range of color temperatures, from warmer yellow-white tones to cooler blue-white tones. Cooler color temperatures often appear brighter to the eye and can improve contrast in some conditions, while warmer tones tend to perform better in fog, dust, or falling snow, where cooler light can scatter and create more glare back toward the driver.
Rather than chasing the highest possible output, consider what conditions you actually drive in most. A light that performs well in clear, dry conditions may be a poor match if you frequently drive in dusty or foggy environments, and vice versa. As with duty cycle and airflow for compressors, compare manufacturer-published specifications directly rather than relying on marketing language.
Camp lighting
Once you've stopped for the day, camp lighting needs shift from long-range visibility to practical, ambient light for cooking, setup, and general camp tasks. A hands-free headlamp is useful for tasks requiring both hands, while a lantern provides broader ambient light for a camp area. Battery-powered or rechargeable options avoid drawing from your vehicle's electrical system.
Keep camp lighting reasonably dim and directed toward your own site rather than bright and pointed outward, both to preserve your night vision and to be considerate of other campers nearby.
String lights or a small lantern hung at a consistent height around a camp area can provide enough ambient light for most evening tasks without the harshness of a single bright point source. Rechargeable options paired with a portable power station reduce how many disposable batteries you need to carry on longer trips.
Final thoughts
Good off-road lighting is less about maximum brightness and more about matching beam pattern to your driving style, aiming lights to avoid glare, understanding your state's regulations, wiring installations safely through a relay and fuse, and choosing practical camp lighting for after you've stopped. When in doubt about installation or regulations, a qualified installer or your state's vehicle code is a better reference than general online advice, including this guide.
As with other vehicle upgrades, it's reasonable to start with a modest lighting setup and expand later once you understand how you actually use it. A single well-aimed light bar covers many beginner needs, and additional lighting can be added incrementally as your trips and terrain demand more.